
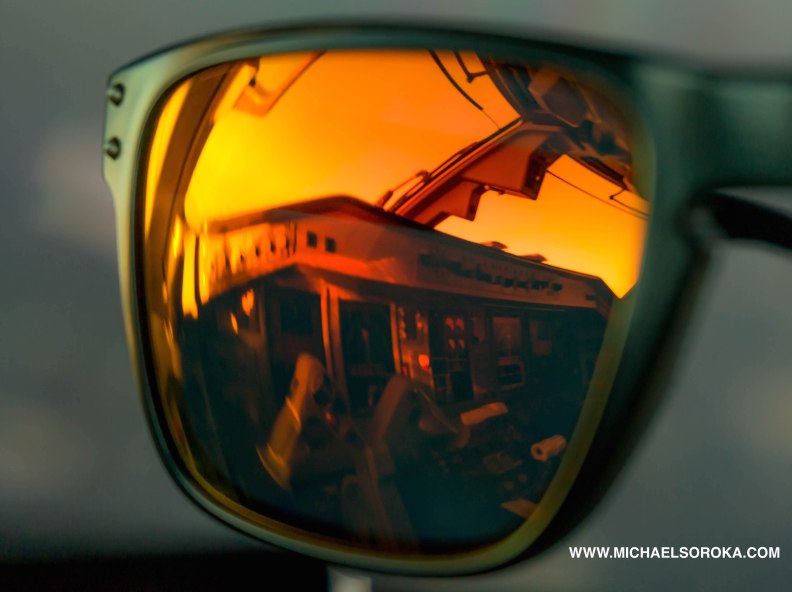
Airplanes provide us with a view of our world that is amazing, breathtaking, and seldom seen. As such, it seems almost a necessity to try to record some of the great views airplanes provide us. This is the allure of aviation photography: Capturing the views airplanes are kind enough to offer.
Unfortunately, as I am sure many of you have come to find, getting good shots out of airplane windows is actually quite difficult. It took me years and a bunch of trial and error get photographs free of the typical fuzz, whitewash, and blur that had plagued me since I first turned my camera skyward.
There are many challenges to achieve good shots out of airplanes. Heavy UV radiation, extreme brights mixed with heavy shadows, and dirty windows are just some of the obstacles which can render even the best cameras into fuzz machines.
I wrote this post to help amateur photographers, pilots, and passengers alike dramatically improve the quality of the pictures they take out of airplane windows. Hopefully, it will help eliminate a little of that “airplane window frustration” and help you capture photographs which more truly represent the stunning views your eye is actually seeing. This post is primarily written for those with DSLR or mirrorless cameras but also provides helpful info for point and shoot or phone cameras.
Getting crisp shots and eliminating bug smears
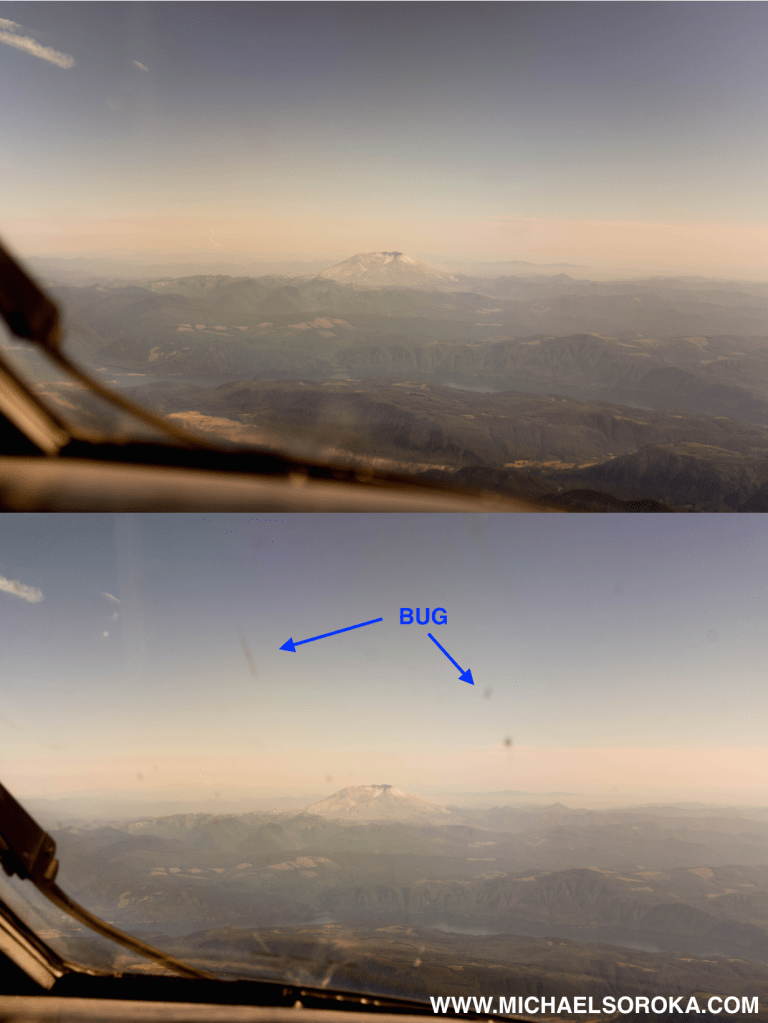
Ugh… This problem plagued most of my early flying photos and is probably the most common issue faced when taking pictures out of an airplane window. Airplane windows, especially cockpit windows are typically covered with bug smears, plagued by disbonding glass or crazing, or more often than not- riddled with pilot sneezes.
Fortunately, this issue is actually easy to combat by adhering to these simple rules:
Set the f-stop as low as possible- This reduces the depth of field and allows you to focus on distant objects rather than on the bugs and boogers on the window.
Turn the autofocus off on your camera- This is critical! Your camera’s autofocus will likely always favor bringing the wings of the mosquitos on the window into crystal clear focus while leaving the beautiful scenery in the background a complete blur. After ruining hundreds of pictures, I finally came to the realization that autofocus is inadequate. Since, I have yet to turn my autofocus on in an airplane.
Hold the camera as close to the window as possible- This reduces the total amount of bugs/snot in the field of view. Of course this is not possible for every shot.
Exposing in a harsh environment
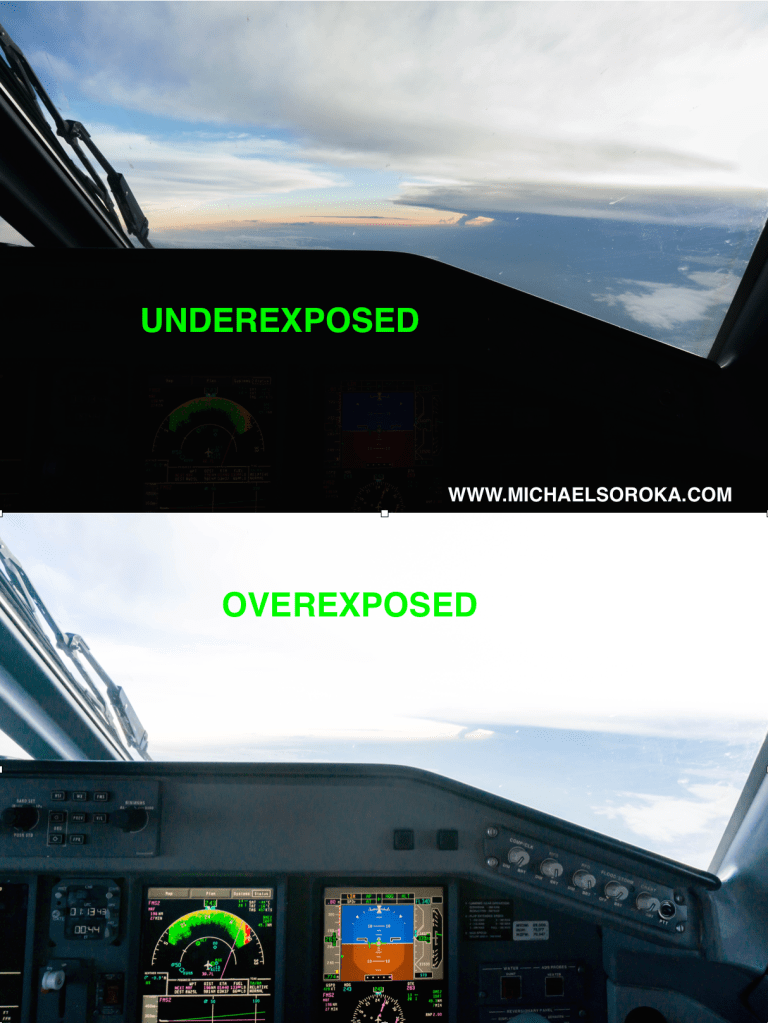
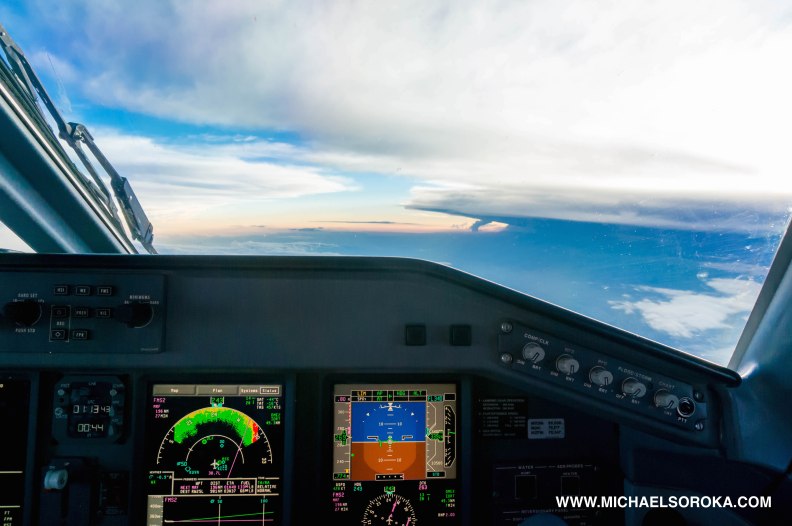
Let’s say you want to get a shot of the classic pilot’s view of the cockpit with about half of the image showing the instrument panel and the other half showing the clouds/scenery out of the windshield. If you attempt this, you will likely end up with one of two poorly exposed images. One image shows the clouds/scenery in all of their splendor with the instruments dark and the other image shows the clouds/scenery completely white with the instruments properly exposed.
Why?
This occurs because the sky is really, really bright compared to the relatively dark interior of the cockpit.
The easiest way to eliminate this issue is to avoid taking pictures during the brightest time of day (around noon) and save shots of both the interior and exterior of the plane for sunset and sunrise. During these “magic hours”, the light levels inside and outside are mostly equal making exposing the image easier.

It isn’t always possible to wait until sunset or sunrise to take pictures however. For these images, a combination of using manual exposure and adjusting white balance with photo editing software is necessary. Here are the necessary steps:
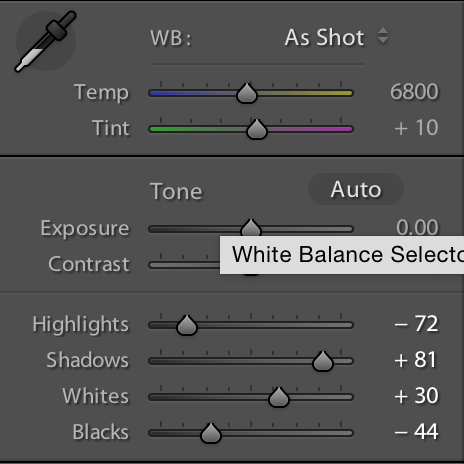
First, set up your camera. Set your ISO to a low setting around 200. This isn’t necessary for exposing the image initially, but will allow more post editing of white balance without getting fuzz. Set your shutter speed to manual and set your camera to take images in RAW format. I usually set my camera to take both RAW and JPEGS simultaneously.
Second, adjust the shutter speed to a setting which half exposes the cockpit and half exposes the outside environment. This may take some trial and error and will leave you with an image that is marginally acceptable straight from the camera.
Third, edit the white balance of your photo to make it look normal. Upload your marginally acceptable raw image to your photo editing software (I use Adobe Lightroom). Reduce the highlights and raise the shadows. This will make the clouds darker and the instruments brighter. Through some tweaking, you should be able to get an image that is nearly balanced inside and out.
Cutting through haze, glare, and whitewash
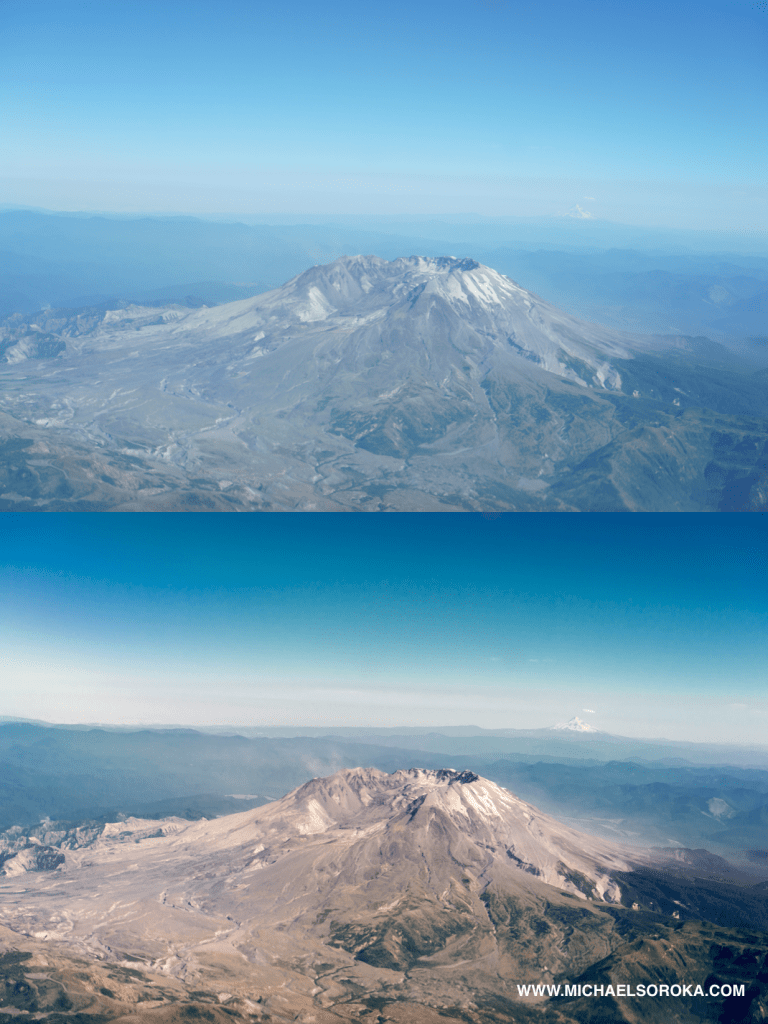
BLUE AND WHITE! Near all of my early shots were plagued by what I have come to call the blue and white death. During the day, the shorter wavelengths of light (blues and violets) are scattered by the gasses in the atmosphere. This is why the sky appears blue. Light is also reflected by various particulate in the atmosphere creating whitewash and hazy skys. Because airplanes fly in the… sky, photographs taken out of airplane windows are plagued by excessive blueing and whitewash.
There are a few ways to combat this with and without post editing:
Use a UV filter filter– This is almost a necessity. A UV filter will dramatically reduce the amount of whitewash in your photographs. If you are looking to maximize the benefit of a UV filter, spend the extra money and use a multicoated one.
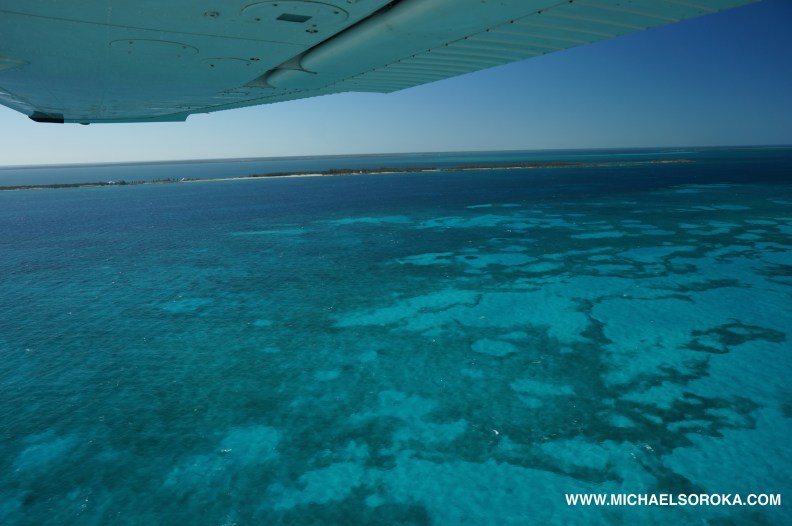
Use a polarizer- The blue light scattered by atmospheric gasses is polarized. Using a circular polarizer cuts glare and whitewash by filtering out much of the reflected light. This significantly increases contrast in you photos and creates bluer skies and more normal looking landscapes. A polarizer is also effective for reducing the surface glare on water. I was able to get some nice shots of the clear water in the Bahamas using a polarizer.
Unfortunately, circular polarizers are useless on the windows of most jets because their windows are lightly polarized. This creates nasty black/dark splotches on your pictures regardless of the rotation of the filter. This is especially unfortunate because the high altitude environments jets operate in also have the most whitewash and glare.

Use a light red filter of you are unable to post edit white balance- If your camera doesn’t have the ability to shoot images in RAW format or you do not have photo editing software, try using a light red filter to make images look more normal. This is nearly identical in theory to underwater dive cameras using red filters. A filter like this one from B&H Photo should do the trick: http://www.bhphotovideo.com/c/product/147905-REG/Hoya_A4985C_49_mm_85C_Color.html. If you have a point and shoot or phone camera, you can simply hold the filter in front of the lens.
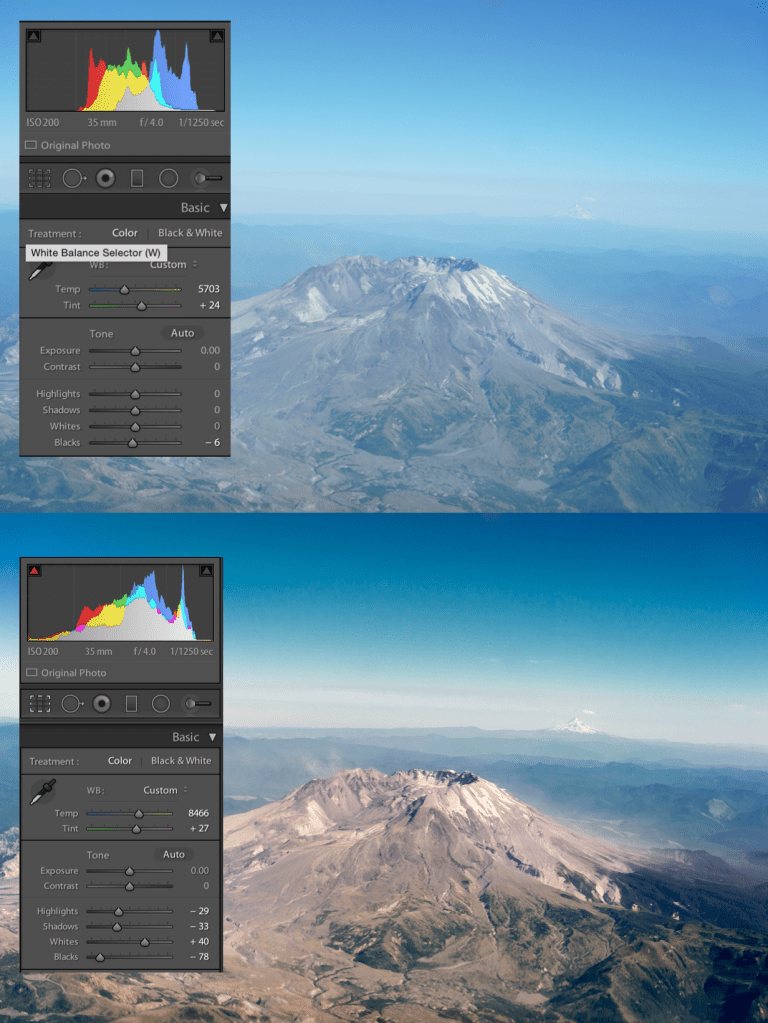
Post editing RAW files to remove blueing and glare- As you can see from the histograms of the two images below, the original photo on top contains an excessive amount of blue. By moving the temperature slider towards yellow, I was able to eliminate a lot of the blueing. Driving the whites and reducing the blacks in the photo adds a nice bit of contrast to the photo and helps remove some of the haze.
Nights and long exposures- Gauges and star gazing

When taking pictures at night, avoid turning up the ISO on your camera and instead sway towards long exposures. Airplane cockpits at night are environments of extreme dark and driving ISO to try to use shutter speeds which allow for handheld images will almost certainly create noise, even with lenses with small f-stops.
Its hard to go wrong with a long exposure of a cockpit at night, almost any angle will look amazing! Here are the tips to get the best shots:
Use a really sturdy mount- Long exposures normally require a tripod. Because a tripod would fit relatively awkwardly in the cockpit, use a camera mount. Avoid suction cups due to vibration issues and use a clamp instead. I have had a lot of success with RAM mounts. http://www.rammount.com/part/RAM-B-121BU
Use manual focus- Autofocus will never be able to properly focus in dark cockpits.
Trade ISO for longer speeds- This eliminates fuzz and allows more post editing.
Taking pictures of stars- Believe it or not, you can take pictures of stars with 30 second exposure times and get fairly sharp images. Even though jets can move through the air faster than 600 miles per hour, that movement relative to huge distant objects is nil. This means as long as the plane isn’t bouncing around much, sharp images are possible. Simply point the camera out the window, focus on a star of your choosing, and wallah… enjoy an excellent shot of the milky way.

